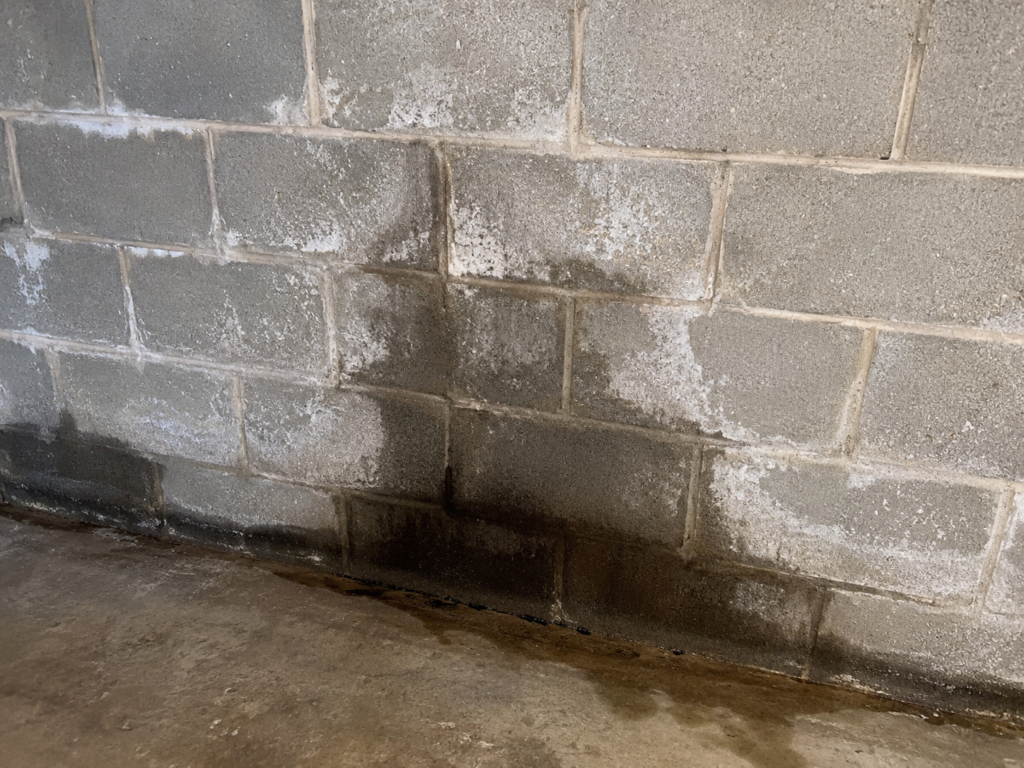
You head downstairs after a long rain and there it is again. A dark stain creeping up the block wall. That damp-laundry smell. Maybe a thin line of water tracing the seam where the floor meets the wall.
Your first instinct is probably a bucket of sealer and a free Saturday. Sometimes that’s right. Often it isn’t, and a two-dollar test tells you which.
Learning how to waterproof basement walls from inside is really two skills. One is knowing which products actually hold water back. The other is knowing when a coating is the wrong tool entirely. A building scientist put three popular sealers through a side-by-side test, and what he found is worth seeing before you spend a dime.
So start with the question almost everyone skips.
Is it seepage, or is it condensation?
These two problems look almost identical on a wall. They don’t have the same fix.
Seepage is groundwater pushing or wicking through the masonry from outside. Condensation is humid indoor air hitting a cold wall and turning to water — the same thing that happens on a glass of iced tea in July.
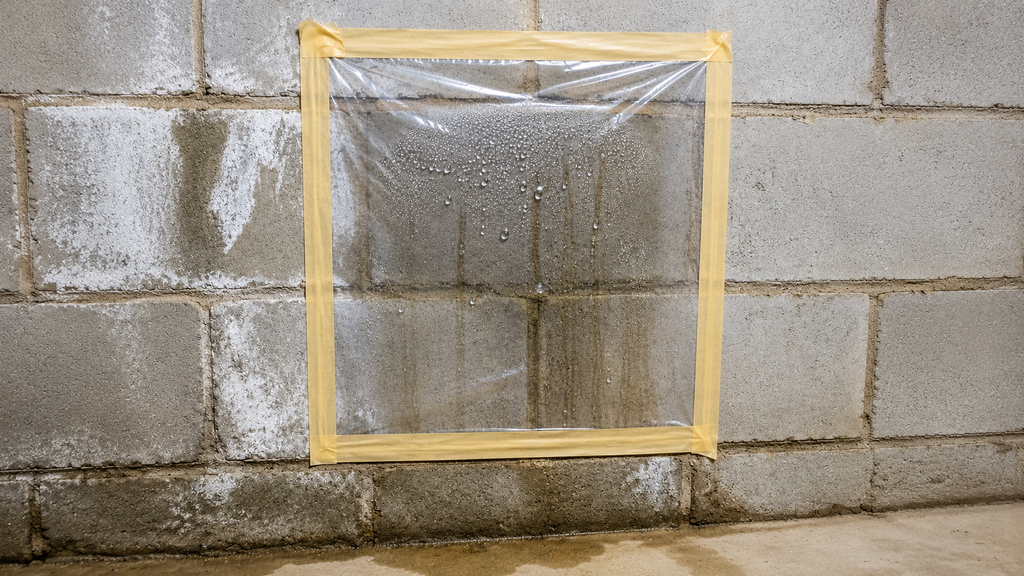
There’s a cheap way to tell them apart. Tape a square of plastic sheeting or aluminum foil flat to the damp wall and seal all four edges with tape. Leave it a couple of days. Water on the room side means condensation. Water trapped behind it, against the concrete, means seepage.
If it’s condensation, no sealer on earth will help, because the water is coming from your own air. A dehumidifier is the fix. The EPA recommends keeping indoor humidity below 60 percent, ideally between 30 and 50 percent, and notes that drying wet materials within 24 to 48 hours usually prevents mold from taking hold.
If the foil comes back wet on the concrete side, you have real water intrusion — and that’s where the rest of this comes in.
What interior waterproofing can and can’t do
Here’s the part most articles skip.
Interior basement waterproofing manages water that is already reaching your wall. It does not remove the water sitting in the soil outside, and it does not reduce hydrostatic pressure — the force of saturated ground pressing against your foundation. Only exterior excavation and drainage do that.
That’s not a reason to skip interior work. It’s a reason to be clear about what you’re buying. A sealer on the inside face of a wall is what the trade calls negative-side waterproofing: it’s fighting water that’s pushing toward it, not away from it. Get the pressure high enough and water wins.
Building Science Corporation’s guidance on keeping water out of basements makes the priority order plain — move roof and surface water away from the foundation first, then handle whatever groundwater is left with drainage.
So the work actually starts outside.
Fix the water outside before you touch a wall
This step costs almost nothing and solves a lot of wet basements.
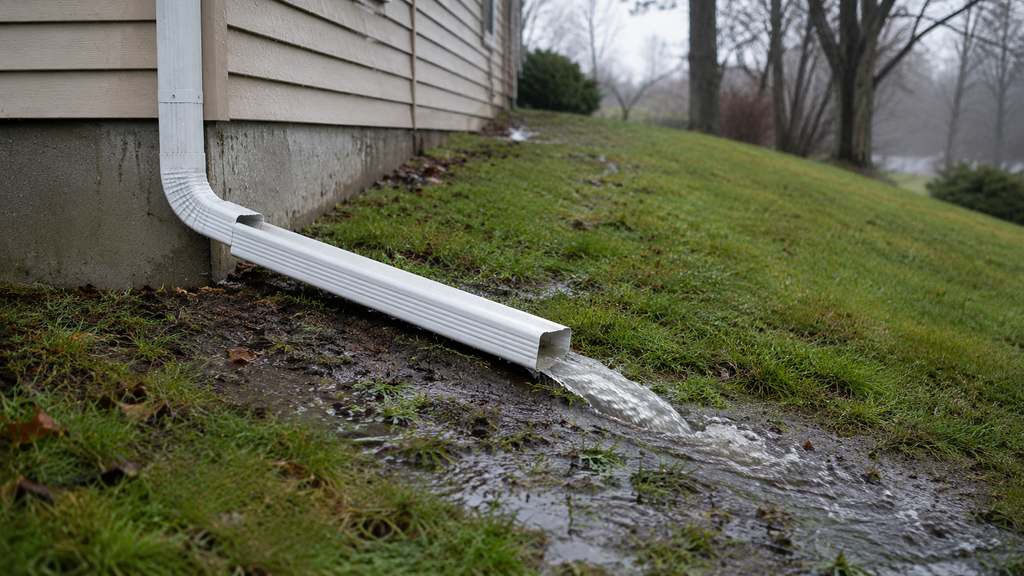
Walk the perimeter during the next real downpour and watch what your gutters and downspouts do. A clogged gutter dumping along the foundation puts hundreds of gallons into the exact soil you’re trying to keep dry.
Extend every downspout well away from the house. Then look at the dirt itself. The EPA’s guidance is simply to make sure the ground slopes away from the building foundation so water doesn’t collect there. Building Science puts it as a rule of thumb: nothing around the house should be flat and level except the floors inside it.
Fill low spots against the wall and re-slope them. Check that window wells drain. Give it one full rain cycle before deciding the interior needs anything.
If the wall is still wet after that, move to the cracks.
How do you seal cracks in basement walls from the inside?
Cracks and the cove joint — the seam where wall meets floor — are the usual entry points, and they need to be closed before any coating goes on.
For a non-moving crack in poured concrete, hydraulic cement is the classic DIY patch. It’s a fast-setting mortar you press into a chiseled-out crack; it expands as it cures and can set even while water trickles. For a cleaner, deeper repair, contractors inject polyurethane or epoxy resin into the full thickness of the wall, which fills the void rather than skinning over it.
Some cracks aren’t a patching job at all. A horizontal crack across a foundation wall, a wall that bows inward, or stair-step cracking through block or brick can indicate soil pressure or movement — a structural condition, not a waterproofing one. Patch those and you’ve hidden a warning light. Have a licensed structural engineer or foundation contractor evaluate them, and check the requirements under your locally adopted version of the International Residential Code (IRC) before any foundation repair. Once your cracks are genuinely just cracks and they’re filled, you can talk about coatings.
Do basement waterproofing paints actually work?
Yes — within limits manufacturers state openly and most homeowners never read.
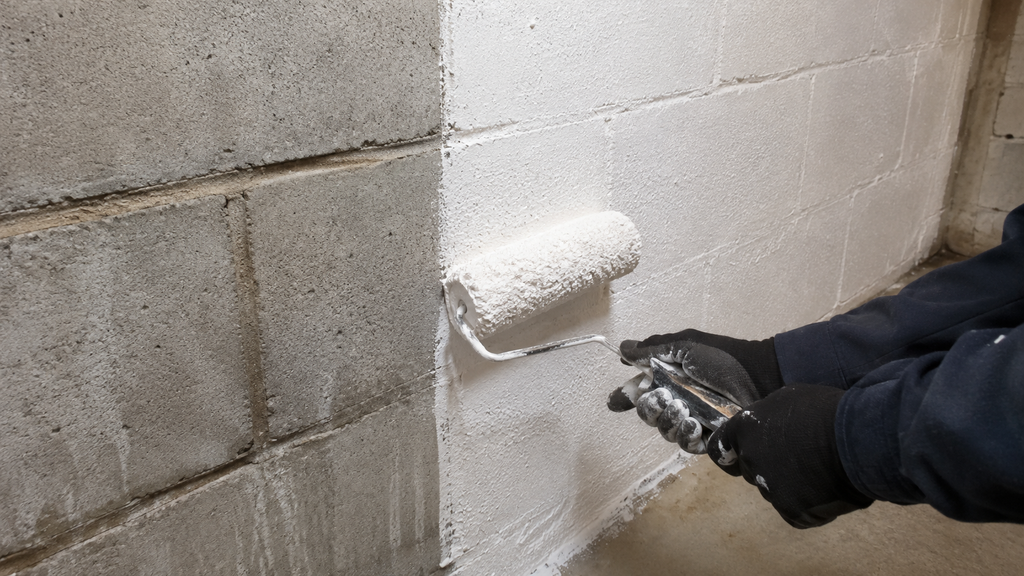
Cementitious masonry waterproofers are thick, cement-based coatings you brush or roll on. They’re not paint. They fill the pores of the masonry and bond into it, which is why they only work on bare, clean masonry. Over old latex paint, they can’t grab, and they peel.
UGL states that its DRYLOK Original will withstand 10 pounds of hydrostatic pressure and DRYLOK Extreme 15 pounds, carrying 10-year and 15-year transferable warranties respectively. Those are real numbers — and a real ceiling. Past that pressure, water gets behind the film.
Here’s where third-party testing gets interesting. A Green Building Advisor article by Peter Yost — a founding member of the site and principal of building science consultancy Building-Wright — with co-author Ann Edminster put three negative-side products on concrete block through both hydrostatic pressure and capillary wicking. The results: DRYLOK Extreme stopped wicking but failed under hydrostatic pressure. Xypex Concentrate resisted hydrostatic pressure but let wicking through. Koster NB1 Grey resisted both. Yost calls the findings anecdotal and worth independent confirmation — but adds a caution that applies to all of them: none of these systems are self-healing for future cracks, so they still need inspecting and repairing over time.
Match the product to the mechanism. A coating handles damp, wicking walls. It is not a dam.
Two safety notes before you open a can. Basements ventilate poorly, so follow the label’s ventilation and respirator guidance, especially for solvent-based products. And if you’re scraping walls that already have visible mold growth, wear eye protection, gloves, and an N-95 or better. Don’t sand mold into the air you’re breathing.
When you need interior drainage and a sump pump instead
If water runs down the wall during storms, pools at the cove joint, or comes up through floor cracks, you’re past what a coating can do.
The standard answer is an interior drain tile system. A contractor cuts a channel around the perimeter of the basement floor, sets perforated pipe in gravel, and routes it to a sump pit where a pump lifts the water out. It doesn’t stop water reaching the wall — it gives that water somewhere to go before it reaches your floor.
Expect real money. Interior French drain work runs $40 to $85 per linear foot, or roughly $4,000 to $8,500 for a 100-foot perimeter (updated September 2026). If not included in the drainage-system quote, professional sump pump installation typically adds $800 to $1,500.
Two details worth insisting on. Building Science recommends a sump pit with battery backup, because power tends to fail during exactly the storms you need pumping for, and an airtight lid, which keeps soil gases like radon from entering the house through the pit.
Then there are the two regulated pieces. Where that pump discharges is not your choice alone — jurisdictions commonly restrict routing sump water into the sanitary sewer, and required setbacks from the foundation and property lines differ from town to town. Confirm the destination with your local building department before the discharge line is run.
The wiring isn’t a DIY item either. A sump pump circuit is electrical work — have a licensed electrician install it and confirm circuit and GFCI requirements with your building department.
The vapor barrier mistake that traps moisture
Some guides tell you to finish the job by stapling 10-mil poly against the basement wall. Building scientists say the opposite, and it’s the most useful thing on this page.
Building Science Corporation’s basement insulation guidance is blunt: no interior vapor barriers should be installed, in order to permit inward drying. A concrete or block wall is damp by nature. Trap that dampness behind plastic and it condenses on the back of the sheet, where it feeds mold and rot in the framing you just built.
What’s recommended instead is rigid foam board against the foundation wall — unfaced XPS, EPS, or spray polyurethane foam — installed airtight but still vapor-permeable enough to let the assembly dry inward. The foam keeps humid room air off the cold concrete, which is what actually prevents the condensation.
If you’re finishing the space, get this right before the studs go up.
The Bottom Line
If you take one thing from all this, make it the two-day foil test. It tells you whether you’re solving a humidity problem or a water problem — which decides everything you do next and everything you spend.
Go tape a square of foil or plastic to the wettest spot on your wall today. Come back Saturday and look at which side is wet. It costs nothing but the tape.
Reviewed by our editorial team, informed by licensed professionals and industry sources cited above.
FAQs
Which parts of interior basement waterproofing can a homeowner do, and which need a pro?
Patching non-moving cracks and rolling a cementitious waterproofer onto bare masonry are within reach for a careful DIYer. Interior drain tile, sump pump wiring, sump discharge routing, and anything involving a bowing or horizontally cracked wall need a licensed professional.
How long does interior basement waterproofing last?
Coating manufacturers offer long warranties — UGL lists 10 years on DRYLOK Original and 15 years on DRYLOK Extreme. However, negative-side coatings are not self-healing, so any new crack that forms later becomes a new leak path and needs repair.
Will interior waterproofing get rid of a musty basement smell?
Only if the smell is coming from water entering through the walls. The EPA’s position is that moisture control is the key to mold control, so if the dampness is condensation from humid indoor air, a sealer won’t touch the odor and a dehumidifier is the better tool.
Does interior waterproofing help you sell a house?
A dry, odor-free basement can ease a common buyer concern, but documented drainage work gives buyers and inspectors more information about the underlying water management than a fresh coat of sealer.
Is a wet basement a health problem?
It can be. The EPA’s position is that the key to mold control is moisture control, and that wet materials dried within 24 to 48 hours usually won’t grow mold. Persistent basement dampness gives mold a continuous water supply.
